We’ve all been there. You’re right in the middle of a high-stakes boss fight or trying to land that perfect headshot in Call of Duty, and suddenly, your character starts lazily drifting to the left like they’re distracted by a tumbleweed blowing across the Crowsnest Highway. Or maybe you go to jump, but your “A” button stays down longer than a Lethbridge winter.
It’s frustrating. It’s annoying. And if you’ve checked the prices of new controllers lately, it’s downright expensive.
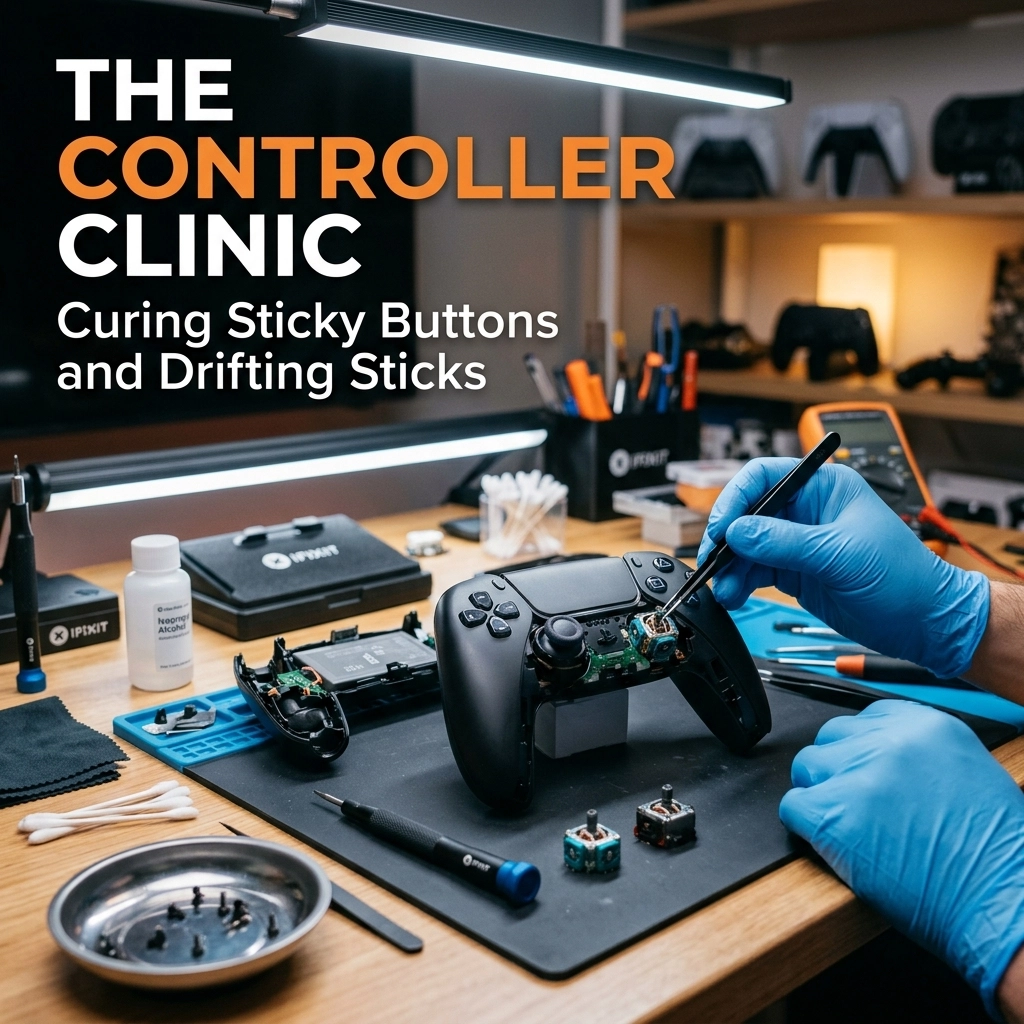
At Second Wind Sales and Services, we hate seeing good tech go to the landfill just because of a little grime or a worn-out part. Your controller isn’t “dead”: it just needs a trip to the clinic. Before you drop $90 on a brand-new replacement, let’s talk about how we can breathe some “second wind” back into your favorite gamepad.
The Sticky Situation: Dealing with Spills and Snacks
Let’s be honest: we aren’t always the most hygienic gamers. Between late-night pizza sessions and the occasional spilled soda, our controllers take a beating. If your buttons feel “mushy” or take a full second to pop back up after you press them, you’re likely dealing with a buildup of sugar, oils, or just plain old Southern Alberta dust.
The Easy Way: The Q-Tip Rescue
You don’t always have to perform surgery to fix a sticky button.
- Power down: Make sure the controller is off (and unplugged).
- The Magic Ingredient: Grab some 90% or higher Isopropyl Alcohol. Pro-tip: Don’t use the 70% stuff if you can help it; the higher the percentage, the faster it evaporates and the less water it leaves behind.
- The Technique: Dip a Q-tip in the alcohol and rub it around the edges of the stuck button. Press the button repeatedly to let the alcohol seep down into the housing.
- Repeat: Do this a few times. The alcohol breaks down the sticky residue.
The Hard Way: Opening the Hood
If the Q-tip method doesn’t work, the “gunk” is likely deep inside the conductive pads. This is where things get a bit more technical. Most modern controllers use a series of T8 or T9 security screws.
Once you’re inside, you’ll find a rubber membrane that sits between the plastic button and the circuit board. If soda got in there, that membrane is probably acting like a glue trap. We take these apart, wash the plastic components in warm soapy water, and clean the circuit board contacts with specialized electronics cleaner.

The Ghost in the Machine: Understanding Stick Drift
Stick drift is the “check engine light” of the gaming world. It’s when your controller registers movement even when you aren’t touching the thumbsticks. It can make menus impossible to navigate and games impossible to play.
Why does it happen? Inside your controller, there are little components called potentiometers. These are essentially sensors that tell the console where the stick is positioned. Over time, the carbon tracks inside these sensors wear down, or dust gets trapped inside, causing “ghost” signals.
The Easy Way: Compressed Air and “The Massage”
Sometimes, drift is just caused by a stray hair or a piece of grit.
- The Blast: Use a can of compressed air. Pull the thumbstick to one side and blast air into the base. Rotate the stick and repeat.
- The Isopropyl Soak: Similar to the button fix, you can put a few drops of high-percentage alcohol at the base of the stick, then rotate it vigorously for 30 seconds.
Pro-tip: If you’re a heavy smoker or live in a particularly dusty area, your controllers will likely suffer from drift much sooner. Consider keeping your gear in a drawer when not in use!
The Hard Way: Component Replacement
If cleaning doesn’t fix the drift, the sensor itself is physically worn out. In the old days, you’d just throw the controller away. But here at Second Wind, we’re big fans of the sustainable living approach.
Fixing this properly usually involves desoldering the old joystick module and soldering in a brand-new one. It’s precision work: the kind of stuff we live for. We use high-end soldering stations and microscopes to ensure those tiny connections are perfect.

Why “Repair” is Better Than “Replace”
We get it: buying a shiny new controller feels good. But here are three reasons why you should consider the tech repair route instead:
- Save Your Cash: A professional repair is often a fraction of the cost of a new PS5 DualSense or Xbox Series controller.
- Environmentally Friendly: E-waste is a massive problem. Every controller we save from the bin is one less piece of plastic and lithium-ion battery sitting in a landfill. Check out our shop updates to see how we’re trying to reduce our footprint.
- Better Parts: Sometimes, the replacement parts we use are actually more durable than the mass-produced ones that come standard in the box.

Don’t Forget the Accessories
It’s not just about the controllers. We see plenty of broken headset jacks, frayed charging cables, and even “broken” consoles that just need a good cleaning.
If your Xbox One is sounding like a jet engine, it’s probably just choked with dust. Much like a truck radiator after a muddy spring, your console needs airflow to stay cool. When the fans get clogged, the system slows down (thermal throttling) to protect itself. A deep clean and some fresh thermal paste can make your console feel brand new again.

The Second Wind Guarantee
Look, I’m not a miracle worker. If you threw your controller at a brick wall after losing a game of FIFA, there might not be much I can do for the shattered plastic. But if your hardware is suffering from the “wear and tear” of everyday life, we can almost always help.
We treat every repair like it’s our own gear. Whether it’s a modern Elite controller or a vintage piece of tech like an old Atari, we take the time to do it right.
When Should You Bring It In?
If you’ve tried the “Easy Way” (the alcohol and the air) and you’re still fighting your controller, it’s time to call in the pros. Don’t risk snapping the delicate ribbon cables inside by trying to pry it open with a butter knife: we’ve seen that happen, and it usually turns a $30 repair into a “buy a new one” situation.
Final Level: Keep it Clean!
The best way to fix a controller is to make sure it never breaks in the first place.
- Wash your hands: It sounds like something your mom would say, but grease is the enemy of electronics.
- No “Gamer Gunk”: Keep the snacks at a distance.
- Storage: When you’re done playing, don’t leave your controller on the floor where it can collect dust (or get stepped on).
If you’re struggling with a drifting stick or a button that just won’t behave, drop us a line or swing by the shop. We’re always happy to talk shop and help you get back into the game without breaking the bank.
For more tips on keeping your tech alive, check out our repair tutorials or browse our blog for more “how-to” guides.
Keep gaming, stay local, and give your tech a second wind!
Leave a Reply